Communication is a huge piece of everything that People Ops and HR do. From that first Welcome email to onboarding, orientation, performance reviews, transfers. When you're working with people, communication is everything.
And that means a good People person sends a lot of emails. A lot.
Often times those emails, at least the first in the thread of communication, start with some template copy. And then you end up having to find that template, and then copy and paste, and then fill in the blanks. Which is annoying and error prone.
So let's see how we can include that email as a task type in a Sora workflow.
First, from the workflow management page, add a task. Give it a name. And then select "automated email."
There are two different types of emails that you can send in Sora. A rich-text email and an HTML email.
A rich-text email looks like what happens when I open up GMail and compose an email. And HTML email has structure and styling, like an email newsletter might have..
Let's look at the rich-text email first.
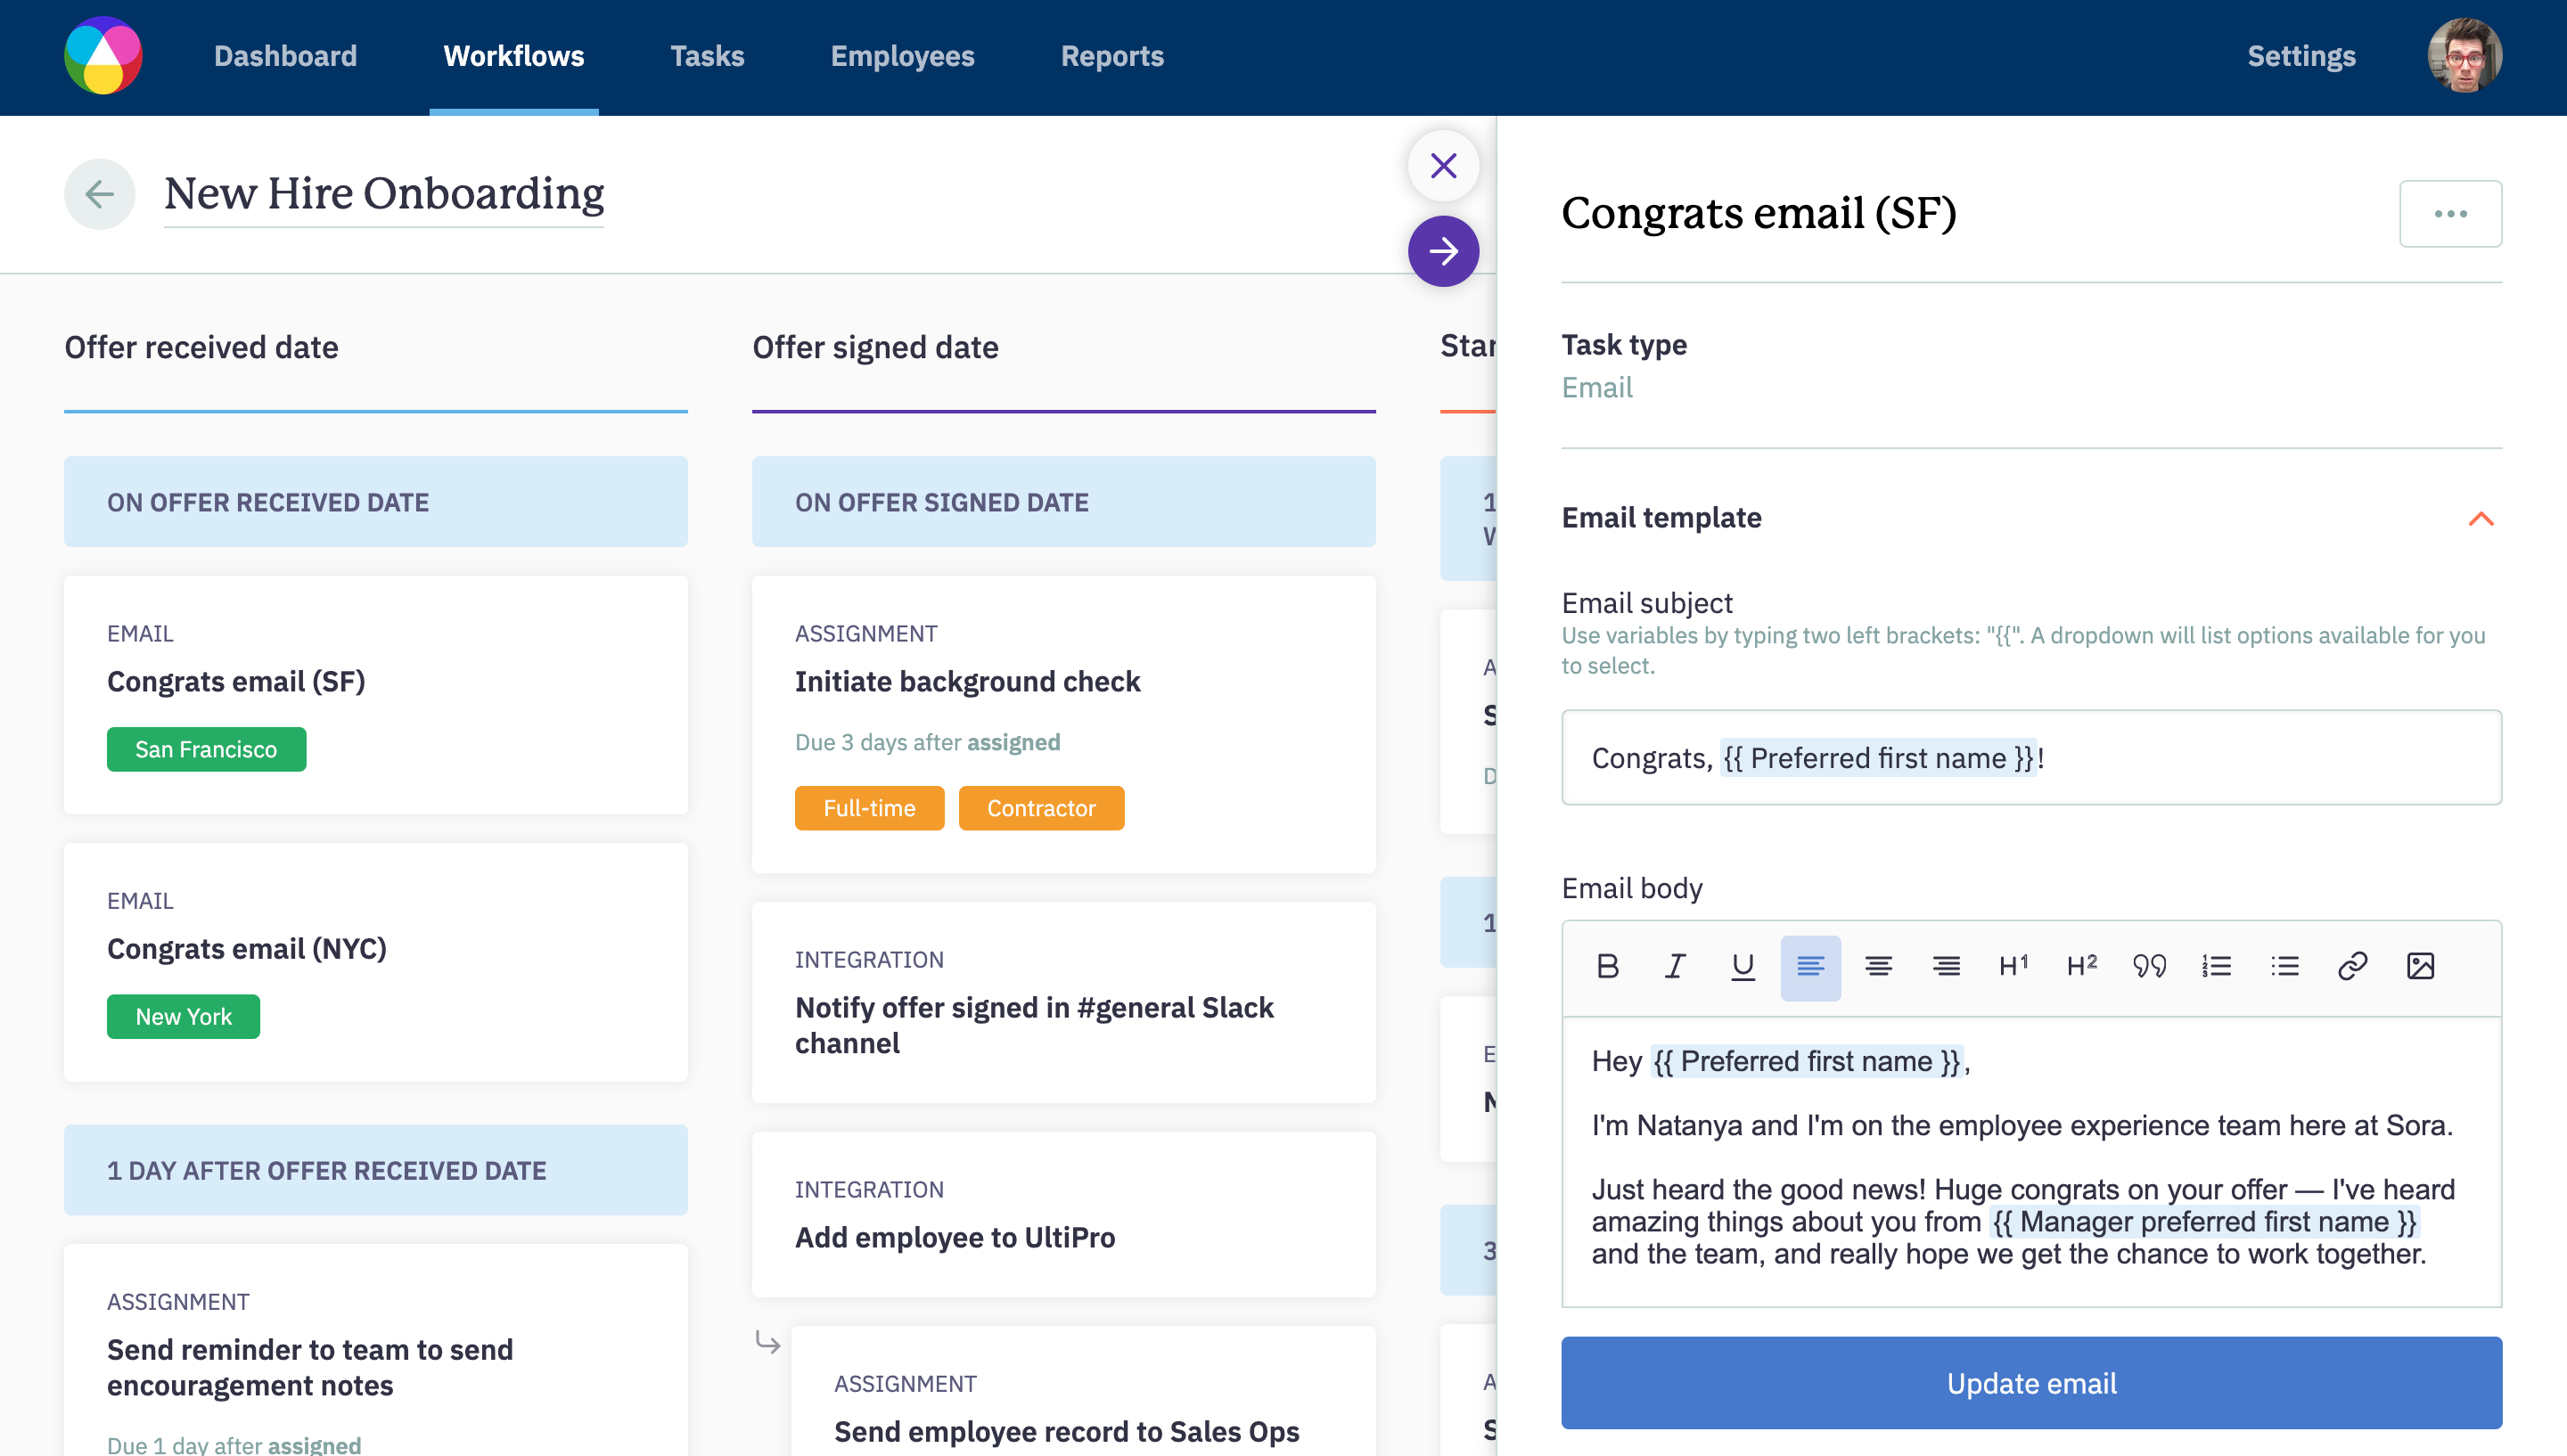
First things first, let's give it a subject. Now, we could just make it "Welcome to the team!" and that works, but let's say we want to personalize it. We can reference any variable from the employee's profile by using double curly brackets.
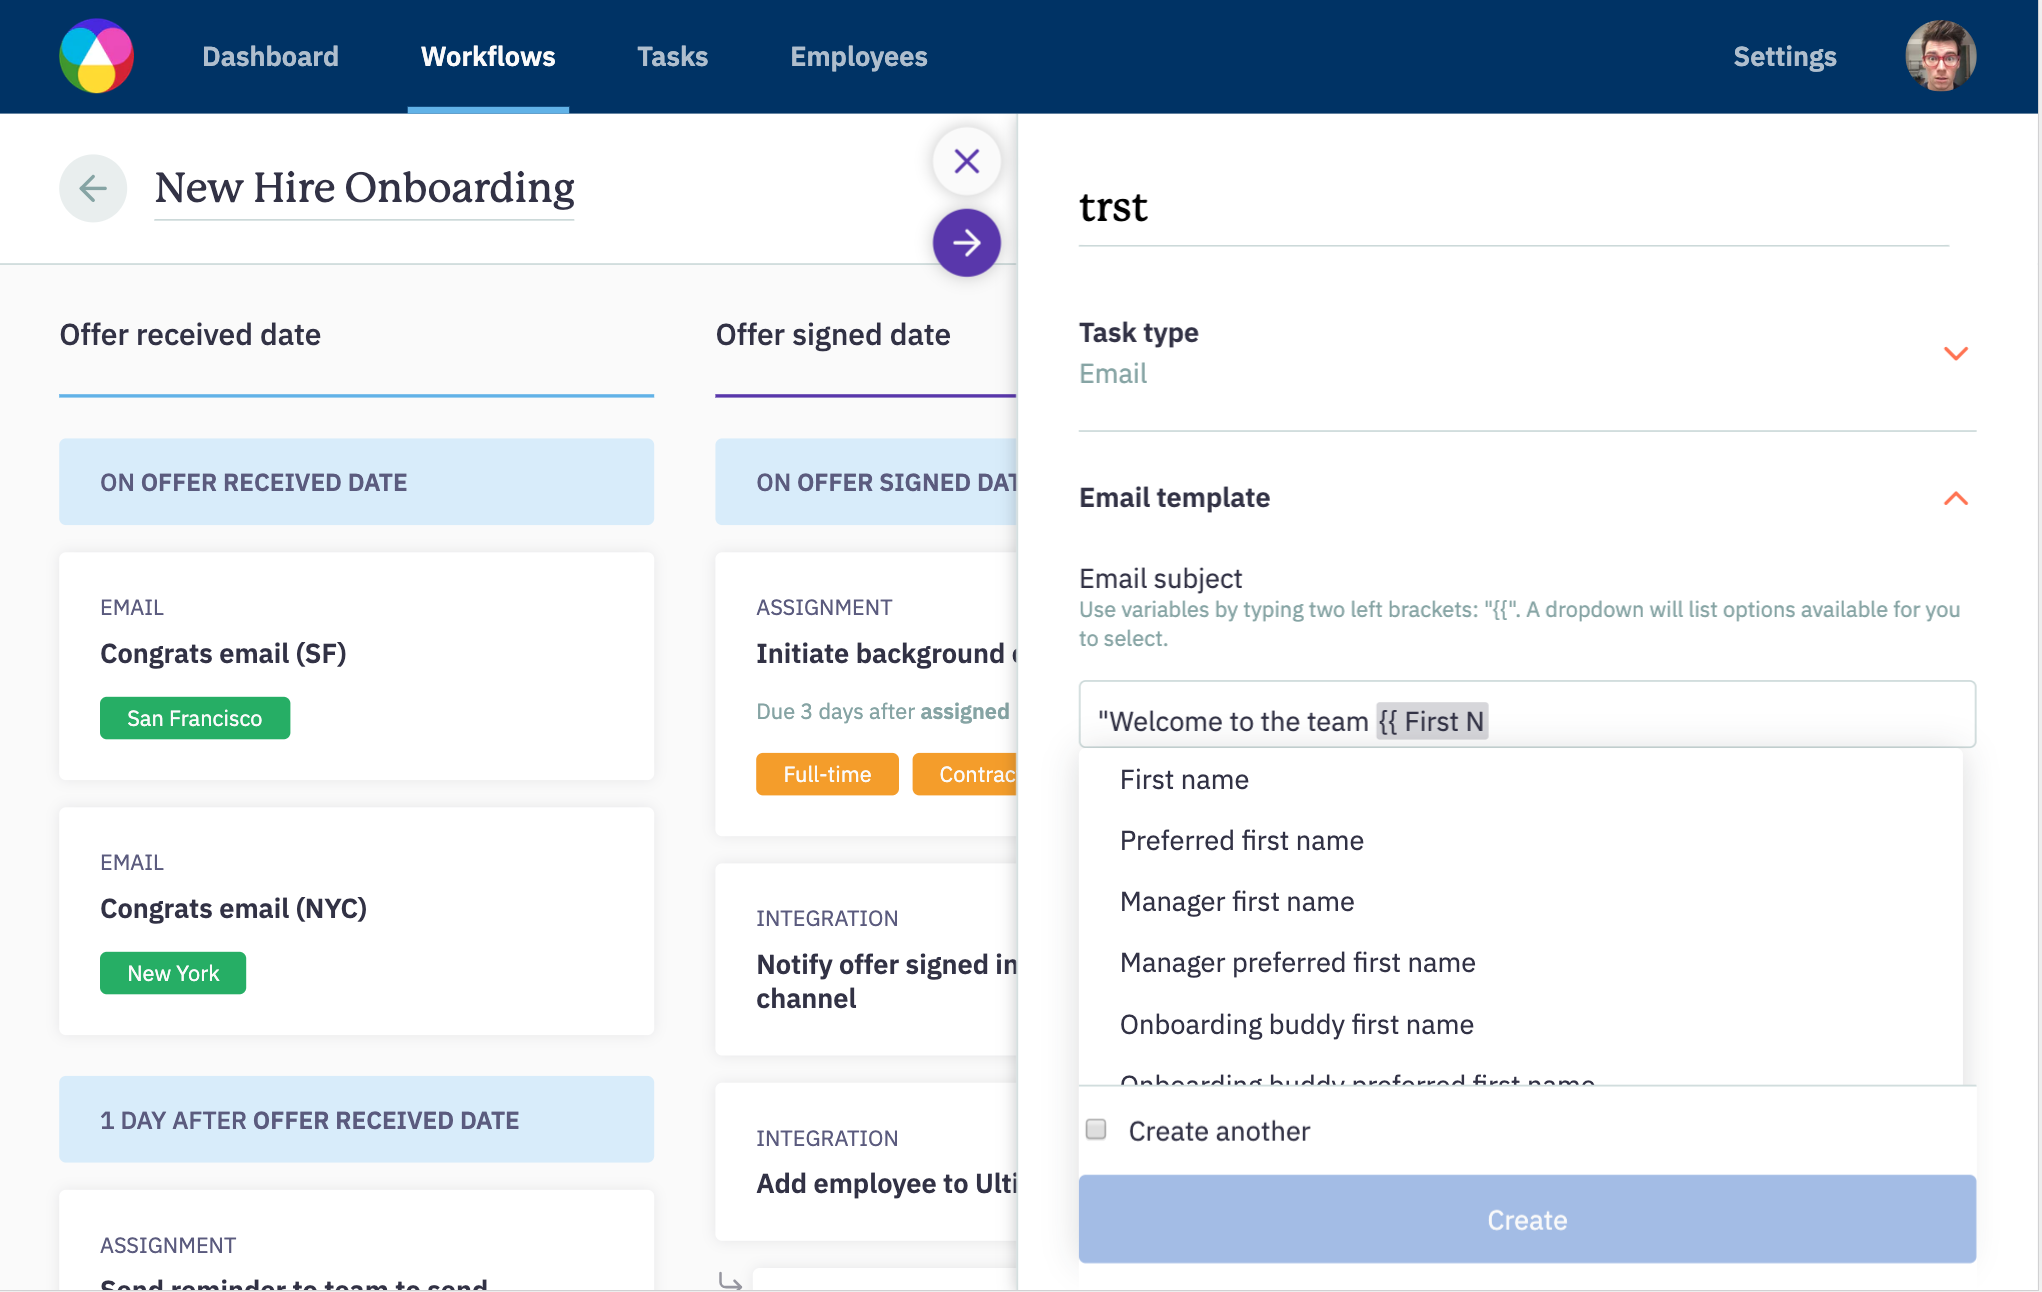
When you type the opening '{{' Sora will show you the fields that are available to you. I want to use their first name, so my subject line is "Welcome to the team {{ First Name }}!"
Now we'll just paste in the copy from our welcome email, and note that you have access to rich-text formatting. So you can do all the things you can do in your email client. Bold text, center it, make bullets. However you need to format it to make it accessible.
And just like we referenced a variable in the subject, we can reference variables from the employee profile in the email body.
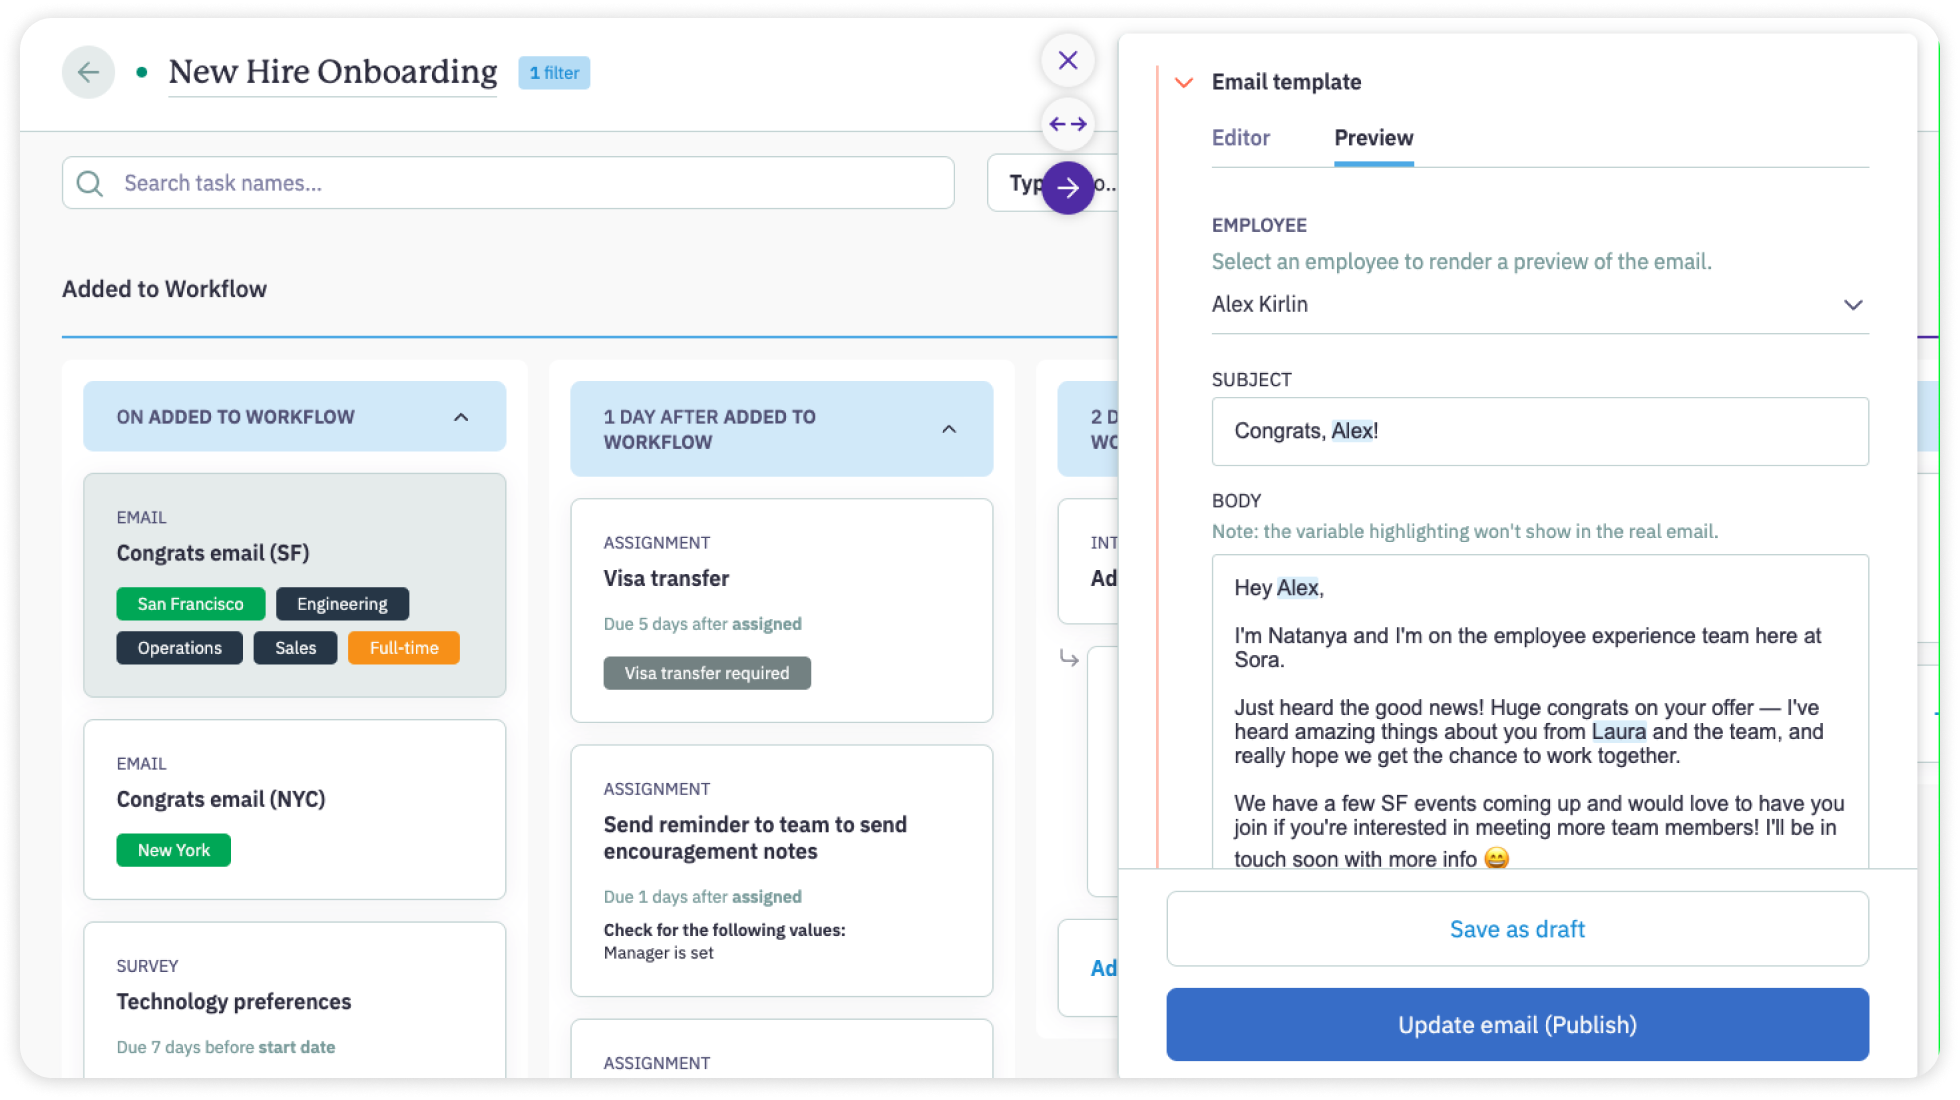
To see how your email personalizations look in your email, just select the Preview tab and then select an employee from the drop-down. Now Sora will show you exactly what the email would look like if it were sent to that employee.
Now, one thing to note, any variable that you reference in an email template needs to be set in an employee's profile for the task to be triggered and sent to them. If the variable isn't set, the task will be flagged and the email won't be sent. If you would like to send an email with undefined variables, you can uncheck the "Variables" box under the email template.
Now, if we want, we can personalize the sender. So I can make it look like it came directly from me by putting my name here.
And then we select the email recipients. For this email I just want to send it to the employee, but in other instances you might want to send an email to their manager or to their IT representative or maybe their onboarding buddy. You can send it to any person or relationship.
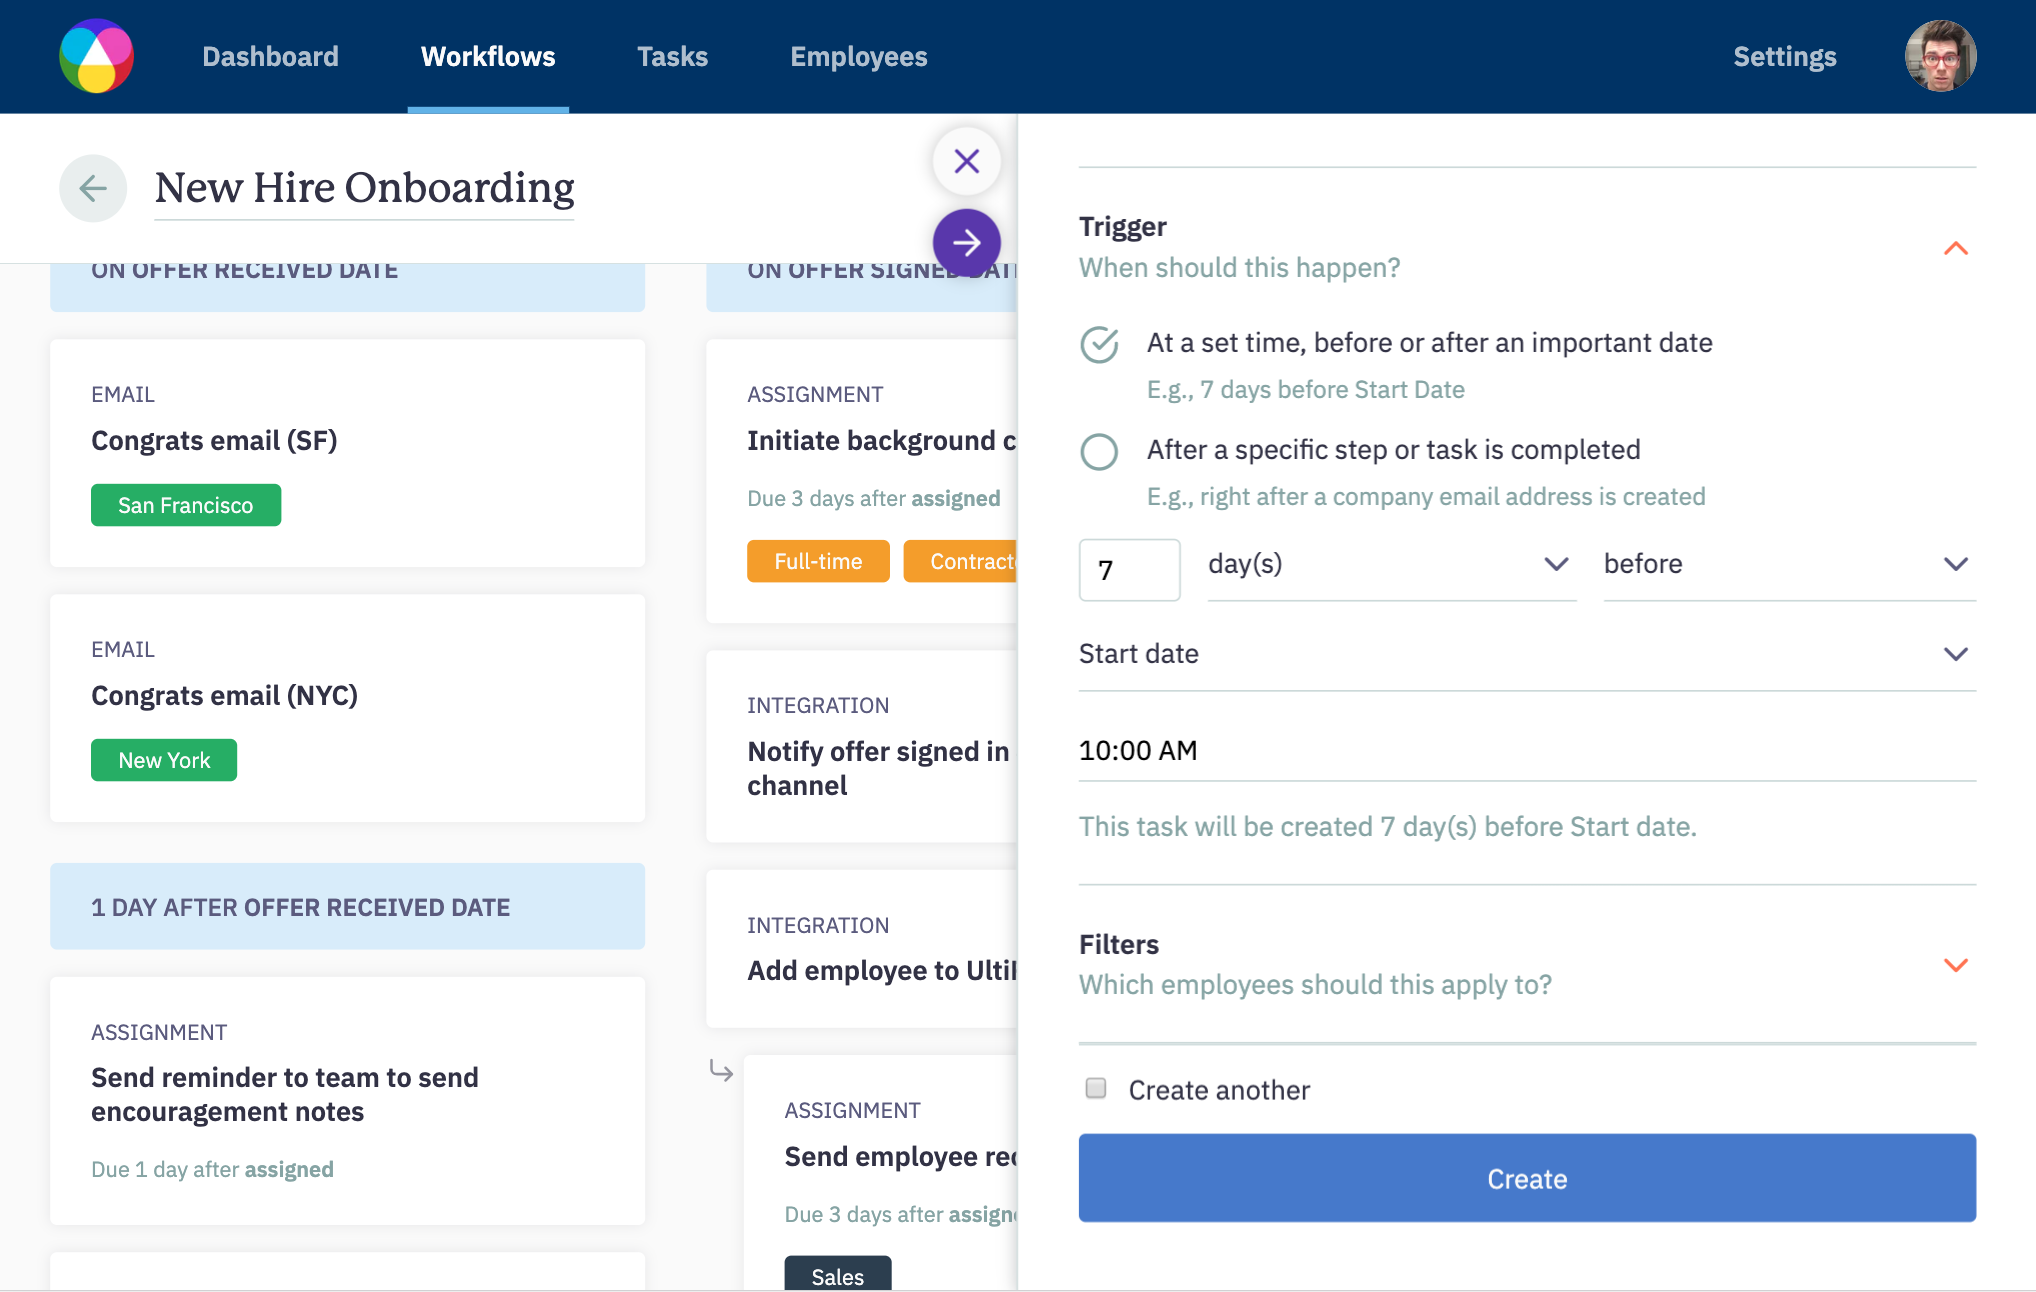
Finally, we want to set the trigger to let Sora know when this email should be sent. We could set this to trigger based on a date in the employee's profile, like 7 days before Start Date, or based on another task like, as soon as the employee is add to the HRIS.
We'll set this to go out 7 days before Start Date, and set it to send at 10 AM.
And then the last thing we could do is set a filter. This is particularly useful when you need to make task for only specific groups of employees, or different tasks for different employees. Like maybe if you want an email to only be sent to employees in the workflow who are in the San Francisco office or on the engineering team.
Now just click "Create" and the automated email task is in your workflow.
So that's the rich-text email, but what about the HTML email.
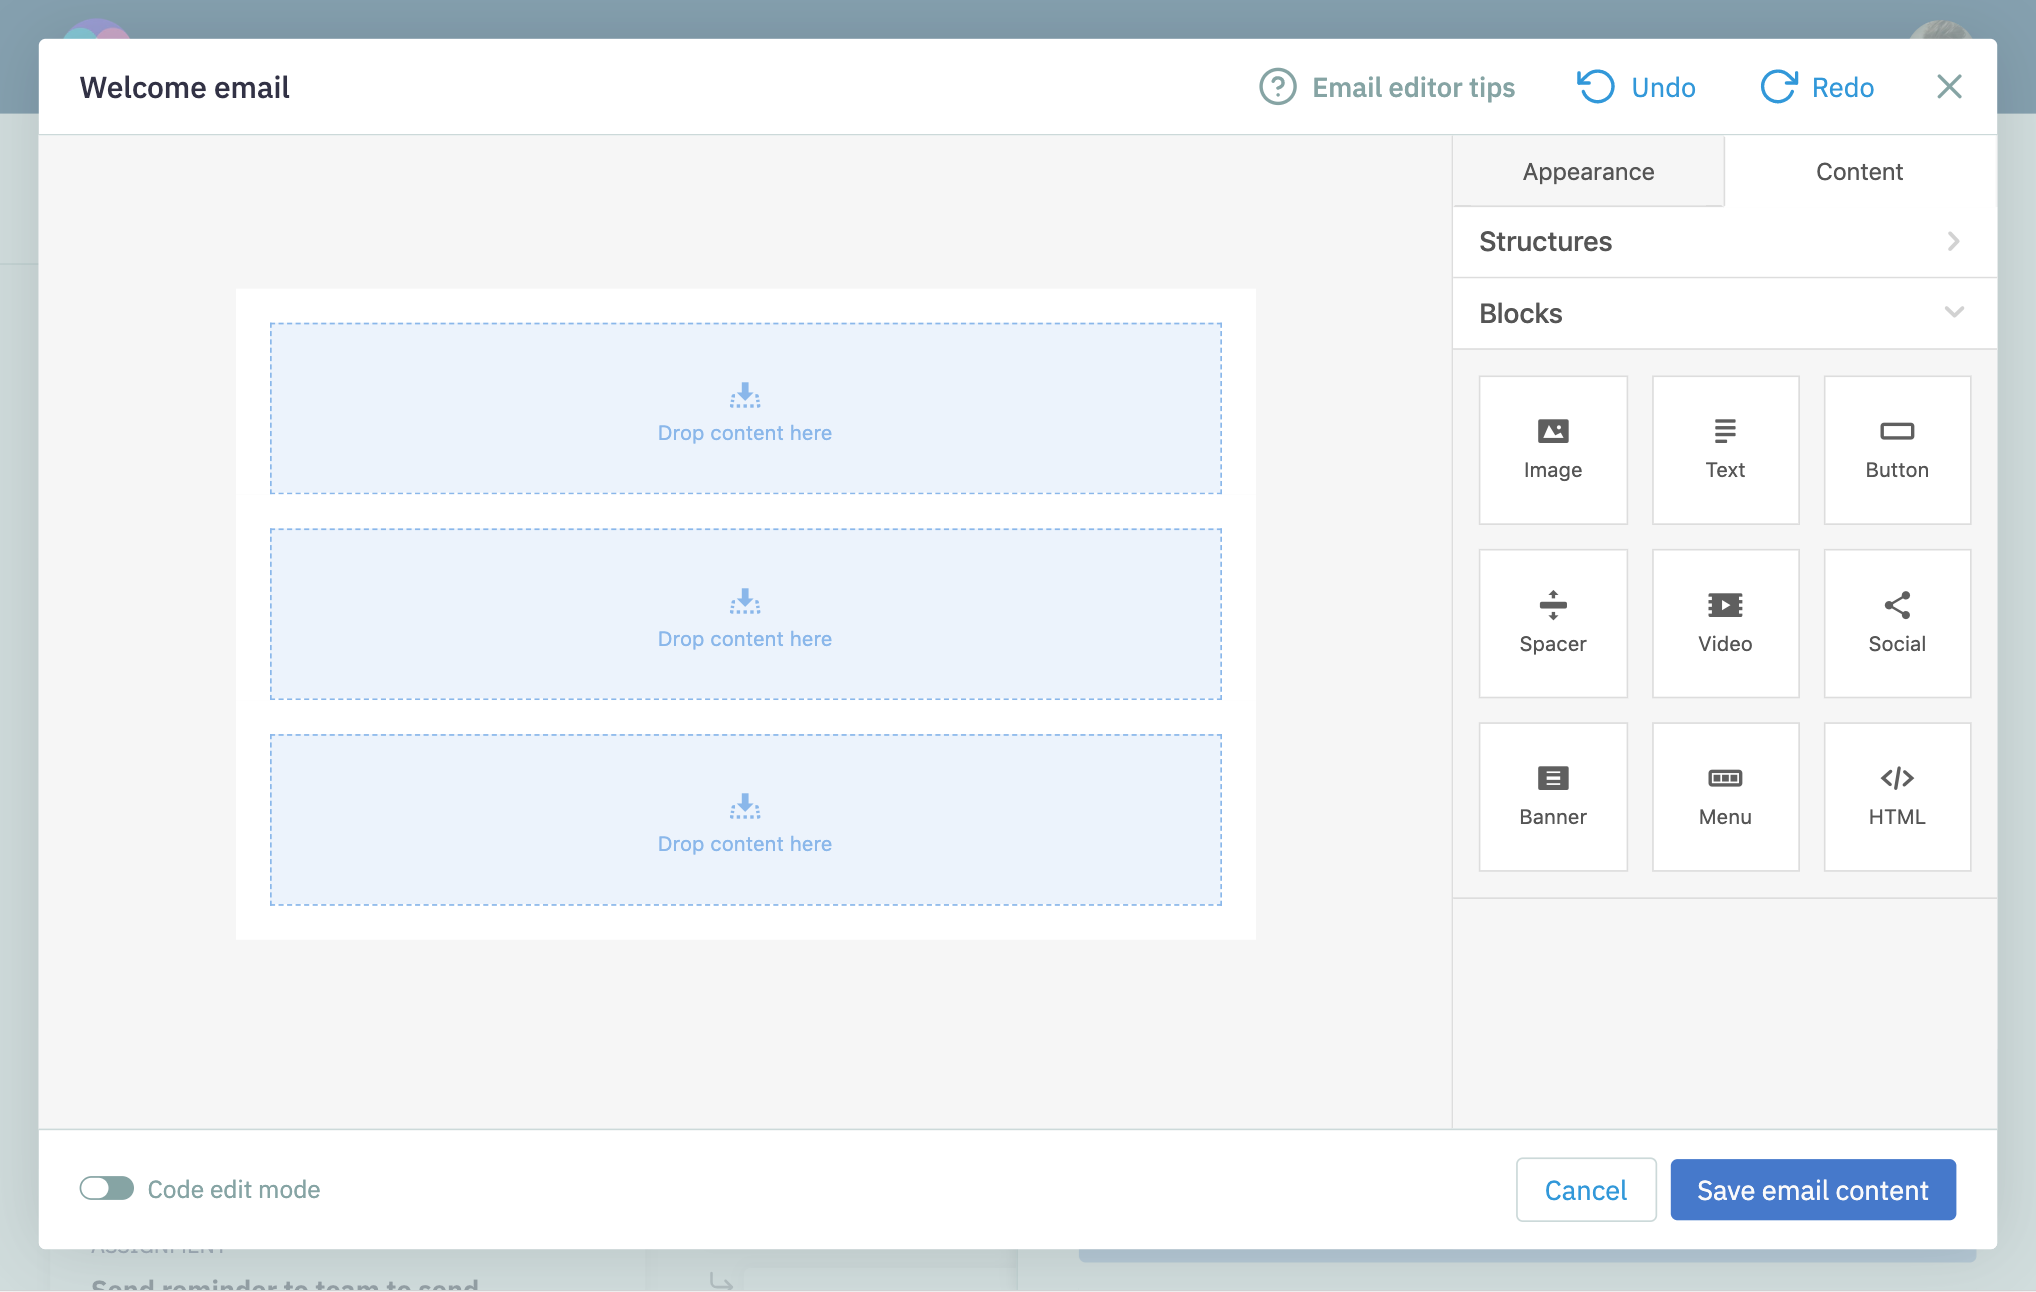
Create an email task just like we did above, but when you get to the email body, flip the drag & drop email editor switch, and open up the editor.
From here you can either use the block structure as is, or you can start adding columns to lay out your email. Then add content to the structure. Just drag and drop right from the side menu to add an image, text, button, or even a video.
Then, use the appearance tab to style the content of your email, adding colors, giving padding, or selecting fonts.
And at any time you can flip the "Code edit mode" switch to see the HTML that you are building from the drag & drop editor. This is particularly helpful if you already have an email built in a previous tool that you just want to copy and paste.
Then save the email template here in the editor and you'll be taken back to the task. Complete the rest of the steps like we did on the rich-text email, and click "Create" to add the automated HTML email to your workflow.